


So I think it is time we talk about lighting! It is a huge topic that covers SO much, but I believe that it is one of the most important aspects of learning how to take beautiful pictures of people. Now just for the record, I do not claim to be an expert on this topic. I do however think it is important for me to share some things I have learned along the way in hopes that it might be helpful to someone else.
We are going to start with the very basics of outdoor lighting. I have found that the very best time of day for lighting is about 2 hours before sunset. I have shot and do shoot at all times of the day, but as far as the most beautiful and flattering light for skin tones I would have to say that the last hour or two before the sun sets are the best. I do 99% of my professional work during that time and I have had the most consistent results because of it. So that is what I am going to focus on today. I will show you through my own pictures different lighting examples and ways to achieve them.
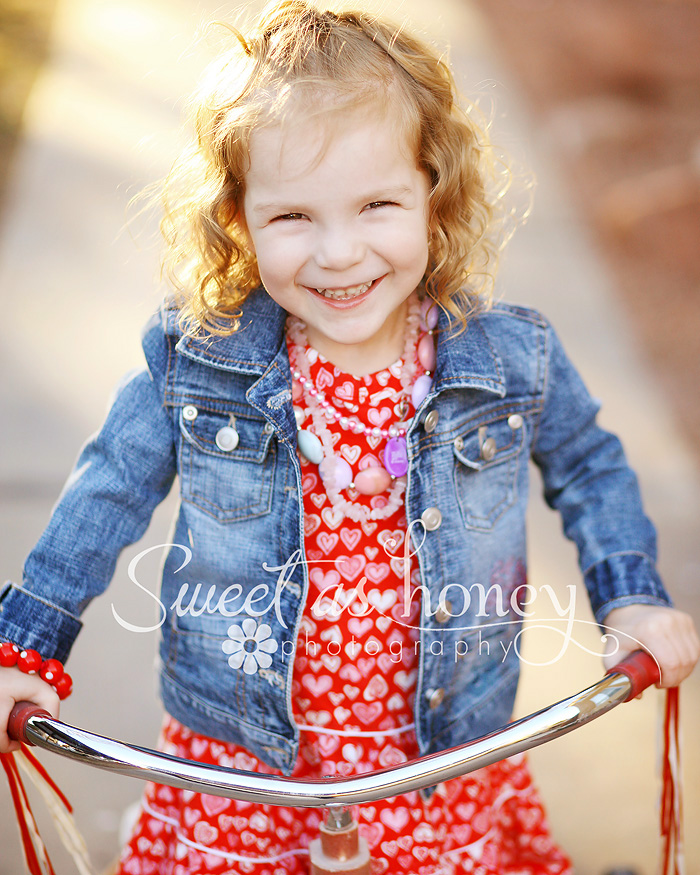
Frontlighting is probably the easiest of all other lighting situations because it is a safe yet effective way to achieve beautiful skin tones. To help you visualize it, just remember that frontlighting is when the sun is in back of the photographer and the subject is facing the photographer and the sun. In all of these examples my subjects are either in the shade facing the sun or the sun is behind a cloud, but still facing the sun.
I had my subjects lay on a blanket and face the sun. We were in a large park with tons of tall trees so we had lots of shade.


These next 2 images were taken in such gorgeous light. Again, the sun had gone behind the mountain and I had them on the dock facing the light source.


The sun had gone behind a cloud in these next two shots. The first half of this shoot I shot mostly backlight, but once the sun went behind the cloud I turned them around to face where the sun would have been.


Let's talk about backlighting! Backlighting is probably the most difficult of all and requires the most practice. There are several ways to achieve backlighting. I will explain how I make it work for me. I love backlit images, but I don't like a lot of haze so I try to shoot so the sun is not directly coming into my lens. For example, I try to angle my camera so it is in the shade, but I place my subject in the sun with their back to the sun.
For this shot, I had the little girls sitting on a stool in the sun, but I was off to the right side and if you can see that tree behind them to the right? That was blocking the sun from my lens so I was able to capture them all lit up, but without all of the haze.

I used the same technique in the next 3 images. I placed my subject in the sun facing me and then moved around until a tree or bush or something was blocking the sun from my lens.


The next two shots have a bit more haze. Especially this image. She was sitting in some weeds and there was nothing to block the sun from my lens. I moved around the best I could, but there was still a good amount of sun hitting my lens. I love it anyways though :)
Another tip for backlighting. I try to place my subject so their back is completely in the sun and NO harsh light is hitting their face. See how her hair is all lit up, but there are no harsh sun spots on her face? This is a good backlit image.

These next two images are the same, but I wanted to show the image before I cropped it so you could see how she was positioned. She is laying on the ground looking up at me. I angled my camera so the sun was not coming into my lens, but she was still lit up.


Another example of shooting from above. When shooting from above you can still achieve backlighting, but if angled right it is without the haze.

The sun was to the right of them. This was more of sidelighting, but I love the effect of the light on both subjects.

I love this image. This is also sidelighting and I love the shadows and depth of this picture.

These next two pictures were taken in the shade and the sun was behind the building, but produced such a beautiful light setting.

I love this one too :) The sun was to the left of them, but they were in the shade.

I would say another backlit image. I love how they are all lit up, but there is no haze. It just takes standing in the right spot.

Hope this was helpful!:)
Melynda
I am LOVING these Photography 101 lessons from Melynda! Now it is YOUR turn. Do you have any questions for her that you would love to have answered in a future post?
5 comments:
Gorgeous pictures. WOW!
Do you have any tips for photographing birthday parties?
So beautiful pictures. <3
great tips! i love all the different segments kiki!
Thank you for such great tips! When it's all broken down like this it makes it so much easier to follow along and figure out what I've been doing (slightly) wrong. Thank you!
P.S. found this entry on Pinterest
Post a Comment